Showing posts with label Windows Vista. Show all posts

Showing posts with label Windows Vista. Show all posts

How to Add Delete Folder Contents to Right Click Context Menu in Windows Vista / Windows 7

With the help of this tutorial you can add the option Delete Folder Contents to the right-click context menu which appears when you right-click a folder.This would come handy at times when you want to delete all the files inside a folder and all it’s sub-folders without deleting the folders themselves.

d

Here’s how you can do this:

  • Click on Start button, type regedit in the search box and hit enter.
  • In Regedit, go to: HKEY_CLASSES_ROOT\Directory\shell
  • Right-click on shell, create a new Key and name it Delete Folder Contents

2                                           v

                                                      v3

  • Again right-click on Delete Folder Contents, create a new Key and name it command

4

  • In the right pane, double-click on (Default) string value and type

       cmd /c "cd /d %1 && del  /s /q *.* in the value data field  and hit OK

5

  • Close Registry Editor and your done.

How to Enable or Disable Taskbar Thumbnail Preview in Windows 7

Posted on Jan 16, 2009


Follow the steps given below to disable the Thumbnail Previews: 

 
1. Click on start and type on search bar gpedit.msc and press enter
2. Now navigate to User Configuration, Administrative Templates, and Start Menu and Taskbar in left pan of Group Policy Editor

 
3. Locate “Turn off Taskbar Thumbnails” in right pan of Group policy editor and double click on it.
4. Select Disable, click Apply and Press ok
5. Now check your Taskbar, it shouldn’t show Thumbnails Preview .
In order to Enable the Taskbar Thumbnail Previews again,  select Enable in step 4.
Please Note: Taskbar Thumbnail Preview only works when you haveEnabled Aero in Windows 7.


Source

How to Speed Up Taskbar Thumbnails in Windows 7


Posted on Jan 14, 2009


Windows 7 brings a new enhanced Taskbar a.k.a Superbar, the most interesting changes  made in the GUI. When you hover your mouse on the program icon, it shows the thumbnail previews of the program.You can change the delay time that the mouse pointer has to stay hovered over an item before that item's thumbnail preview is displayed.

Here's how you can do this>>>

1. Click on the Start button, type regedit in the search box and hit enter.
2. Now you'll have Registry Editor open. Navigate to HKEY_CURRENT_USER\Control Panel\Mouse


3. In the right pane, double-click on MouseHoverTime and type any value less than 400, say 20 in the Value data field (the values are in milliseconds). If u want them to appear ultrafast then type 0.


4.  Now close Registry Editor and restart the computer to see the results.
Now hover your mouse on any taskbar icon and see if thumbnails are appearing faster than before.

Install Windows 7 via USB or SD Media

 Posted on Jan 12, 2009

 
 So Windows 7 beta is out the door and you are ready to begin your beta experience.  Over the next few months there will be additional builds for Windows 7 (x86 and x64) as well as Windows Server 2008 R2 and that leads to a lot of installs and a lot of DVD burning and useless DVDs as soon as a new build is out.  So why not install from USB or whatever other removable media your computer can boot from?  Insert your removable media into a Windows XP or Vista PC and run the following commands from an elevated command prompt. 
  1. diskpart
  2. list disk (find the disk number for the removable media)
  3. select disk #
  4. clean
  5. create partition primary
  6. select partition 1
  7. active
  8. format fs=fat32
  9. assign letter=y (or any free drive letter)
  10. exit

Once that is complete mount the ISO and run the following command.

xcopy x:\*.* /s/e/f y:\

Where “x” is the drive letter of the mounted ISO.  Once complete boot off the device and install the OS.  When a new Windows 7 or 2008 R2 build is released, simply delete the contents, rerun the xcopy command and you are ready to go again.  As a note this also works for Windows Vista and Server 2008 but you already figured that out :) 

Fix: Dragging a Folder does not create Shortcut in Favorite Links in Vista

Posted on Sept. 8, 2008


In Windows Vista we have got Favorite Links under Windows Explorer where we can place shortcuts to folders for easy access. But I've seen a problem on some vista pc's where when i tried to create a link for a folder by dragging it in the Favorite Links area, the whole data inside that folder including sub-folders were moved to the Links folder which was not supposed to be.(see screenshot)


The solution of this lies in the Desktop.ini file in the Links folder. Open it with Notepad and look for the line DefaultDropEffect=4, if that's missing then copy and paste it after the line:


IconResource=%SystemRoot%\system32\imageres.dll,-185.


Now save the file.The DefaultDropEffect line sets the default drag-and-drop action. Setting it 4 creates a shortcut of the dragged folder in the Links folder.


After that right-click on the desktop.ini file and set its attribute to Read-only and Log off Windows. Now you should be able to create a link in the Favorite Links area by dragging a folder instead of moving it.(see screenshot)


Remove Shutdown options from Vista Start menu

Posted on Sept 6, 2008
 
In this tutorial i'll show you how to remove the Shutdown, Hibernate, Sleep and Restart options from the start menu in case you don't want them to be there and also from the Windows Security screen which appears when you press Ctrl+Alt+Del.
 

Here's how you can do this>>>
  •  Click on the Start button.
  •  Type gpedit.msc in the search box and hit Enter. 
  •  Click Continue to bypass UAC prompt. 
  •  In the left pane, navigate to User Configuration>>Administrative  Templates>>Start Menu and Taskbar 
  •  In the right pane, double-click on Remove and prevent access to the Shutdown, Restart,Sleep, and Hibernate commands


  • In the dialog box that appears, click on Enabled radio button and then OK.
  • Exit from Local Group Policy Editor.

New Aero_Redefined theme for Windows Vista

Posted on Aug 4, 2008

I've created a new Aero_Redefined theme for Windows Vista keeping in mind the simplicity of the default windows Aero. It does not contain any special stuff but has a sober and elegant shellstyle that may suit your liking. As it's my first theme, tell me how is it by giving some comments which would help me in doing better in future.


How to install>>>


1.To install this theme you need to patch your system, via VistaGlazz or TuneUp Utilities.

2.Next unpack “Aero_Redefined”
to ‘C:\Windows\Resources\Themes’ (where C is the partition with Windows installed)

3.Now you can change the visual style by clicking any .msstyle file, or via   ‘Control Panel\Appearance and Personalization\Personalization\Window Color and Appearance’
  
Download Links:


 Aero_Redefined 

 VistaGlazz
 

Eight ways to save time with Windows Vista

Posted on Sept 1, 2008

Windows Vista comes with loads of features that can help save you time, especially with tasks that you perform regularly. Try out these tips and see how much time you can save


  • Send an email straight from your desktop

If there’s someone you often send mail to, you can add a shortcut to your desktop to create a new email. Make a new shortcut and type in mailto: followed by your recipient’s email address, for example mailto:windowsvista(at)futurenet(.)co(.)uk. Click Next, give the shortcut a meaningful name and then click Finish. The new shortcut will appear on your desktop, and double-clicking it will open up a blank email in your default email editor with the recipient’s address already filled in.


  • Quickly check your network connection status from your desktop

You can create a shortcut to quickly check the status of your internet connection, saving you the effort of clicking through a number of windows and folders. Go to Start > Control Panel > Network and Internet > Network and Sharing Center > Manage network connections. Right-click on the connection you want to check the status of and select Create Shortcut. This will place a shortcut on your desktop, and when you double-click it you will be taken directly to the status page of your connection.


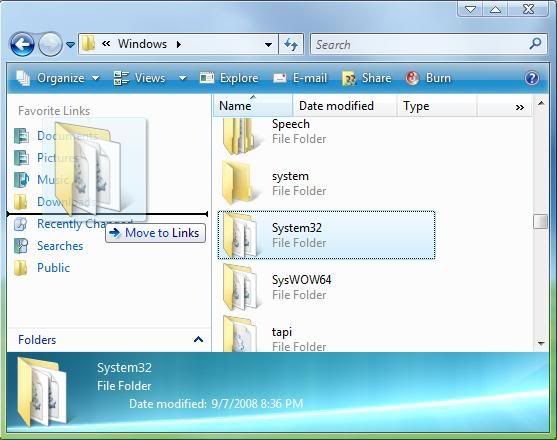
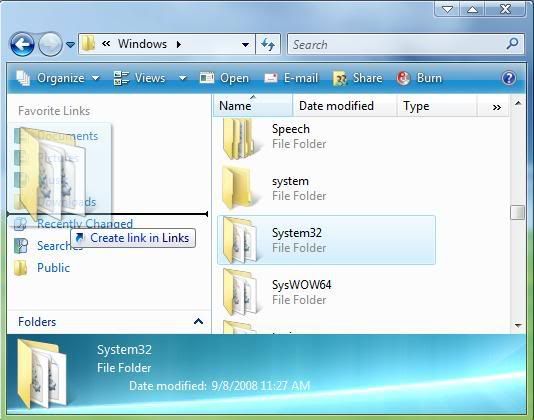
  • Create shortcuts to your favourite web sites

You can save time by having shortcuts to frequently visited web sites on your desktop. Browse to the page that you want quick access to, and then drag and drop the small icon on the left of the address bar to your desktop. Now all you need to do is double-click the shortcut to go straight to the page.


  • Get all your breaking news in one place with RSS feeds

If you have a number of news sites that you check regularly you can save time by subscribing to their RSS feed (click on the orange RSS icon on the web site). This sends their latest headlines directly to your RSS reader (such as Microsoft Outlook or Internet Explorer), allowing you to keep up to date with all your favourite sites in one place. The RSS feed for this web site is
www.windowsvistamagazine.com


  • Use Start Search

Use the Start Search to quickly launch programs rather than trawling through your computer to get them. Below are some handy phrases to type into the search to bring up the application straight away. Depending on what you have installed on your computer you may be able to find other phrases to launch your programs with, so it is worth experimenting.

CMD Command prompt
DEV Device Manager
SYS System Restore
NETW Connect to a Network Projector
UPD Windows Update
PROG Default Programs
EVE Event viewer


  • Get the App Launcher sidebar gadget

There are a number of gadgets available from Windows Live Gallery that can help you speed up your computer use. The App Launcher gadget grants you fast access to files and folders by clicking on an icon that instantly launches them. It helps keep your desktop and Quick Launch free from clutter. ]


  • Install Launchy

Launchy is a powerful keystroke launcher, which is accessed by pressing Alt and Space bar. You can then type in the name of the application, file or web site you want to launch and press Enter. Launchy is intelligent enough to guess pretty accurately what you are looking for whilst you type, so by just typing goo then pressing Enter will open Google. You can download it for free at www.launchy.net


  • Use Task Scheduler to automate tasks

Save yourself a lot of time by using Task Scheduler to make Windows Vista automatically perform certain tasks. Type ‘Task Scheduler’ into Start Search and select what you want it to do, from defragmenting your hard drive to backing up your files, and when.

source

Make your Desktop Background permanent in Vista

Posted on Sept 1, 2008


If you like your desktop background wallpaper and don't want anybody to change it then this tutotrial will be useful for you. The tutorial consists of two steps:  

1. Removing the Desktop Background option from the Personalize appearance and sounds screen.  
2. Disabling the Set as Desktop Background option which appears on right-clicking an image.

But before doing that you shud set your favourite wallpaper on desktop.

Here's how you can do this>>>

1.Removing the Desktop Background option

  • Click on the Start button
  • Type gpedit.msc in the search box and hit Enter. This will open Local Group Policy Editor.
  • In the left pane, navigate to User Configuration>>Administrative Templates>>Control Panel>>Display.
  • In the right pane, double-click on Prevent changing wallpaper.


  •  In the dialog box that appears, click on Enabled and then OK but don't close GPEditor.

 2. Disabling the Set as Desktop Background option

  • In the left pane of the local group policy editor, navigate to User Configuration>>Administrative Templates>>Desktop>>Desktop


  • Moving into the right pane, double-click on Desktop Wallpaper.
  • Click on Enabled radio button.
  • In the Wallpaper Name field, type the full path of the wallpaper you want to display.
  • In the Wallpaper Style field, select whether you want the wallpaper to be in Center, Stretch, or Tile style.
  • Click OK and exit the Local Group Policy Editor.
  • Reboot your system to reflect the changes.

Access Windows Registry through Explorer Shell in Vista

Posted on Aug 30, 2008


We all know how important Windows Registry is when it comes to tweak settings in windows. We use it to customize the way windows works. To make any changes in registry we have to run Registry Editor which can be done in many ways. But there is an alternative of not going to Registry Editor and that is the Windows Vista Registry Shell Namespace Extension.This Shell Extension allows Windows Explorer to be able to view and interact with the Windows Registry. You can search, edit, create or delete registry information via windows explorer.It also demonstrates new concepts in Vista including the property system extensibility and content indexing.


See how it works:


Download : 
 

Tweak the Recycle Bin Context Menu in Vista

Posted on Aug 29, 2008

With the help of this tutorial you will learn how to add a program of your choice to the Recycle Bin context menu for easy use in Windows Vista. As an example I will be using the program TuneUp Utilities.

Here's how you can do this>>>
  • Click on the Start button.
  • In the search box, type regedit and hit Enter.
  • Click Continue to bypass button the UAC prompt.
  • In regedit, navigate to
    HKEY_CLASSES_ROOT\CLSID\{645FF040-5081-101B-9F0B-00AA002F954E}\shell
  • In the left pane, right click shell and click Key under the New menu.
  • Type the name of the program TuneUp (you can type anything you wish, it just makes sense to give the name of the program) and press Enter.
  • Again in the left pane, right click on the TuneUp key we created in the above step and click Key under the New menu.
  • Type command and hit Enter.

  • Moving into the right pane, double-click on (Default) and click Modify
  • In the Value data field, type the full path of the program.exe file

  • Click OK to apply
  • Exit Registry Editor and you're done.
  • You can add as many programs as you want. Just repeat the same steps for each program.

Customize Vista Logon screen with a Text Message

Posted on Aug 26, 2008

With the help of this tutorial you can display a Message Title and Text of your choice. This message will be displayed on a screen which will appear before the logon screen in Windows Vista.


Here's how you can do this>>>

  • Click on the Start button, type regedit and hit Enter
  • Click Continue to bypass the UAC
  • In Registry Editor, navigate to HKEY_LOCAL_MACHINE\SOFTWARE\Microsoft\Windows\CurrentVersion\Policies\System


  • Move into the right pane, double click on legalnoticecaption and click Modify
  • In the Value data field, type a Title of your choice say "Warning ! Danger Ahead" (without the quotes) and hit Enter.
  • To give a text, double-click on legalnoticetext given right below and click Modify again.
  • In the Value data field, type a text of your choice say "Tighten your seat belts and Get ready to explore the World of Windows Vista"(without the quotes) and press Enter.
  • Exit Registry Editor and Log off to see the changes.

This is how the screen shud look:


Prevent Access to Removable Storage Devices in Vista

Posted on Aug 26, 2008

This tutorial will show you how to prevent access to all removable storage drives like CD, DVD and USB Pen Drives in Windows Vista. This will be useful in order to prevent any kind of unwanted data to be copied or moved to your computer and also to prevent harmful programs that can access your computer from any removable devices.


Here's how you can do this>>>
  • Click on Start button, type gpedit.msc in the search box and press Enter
  • Click on Continue to bypass the UAC prompt.
  • In the left pane, navigate to User Configuration>>Administrative Templates>>System>>Removable Storage Access
  • In the right pane, double-click on Removable Storage Access: Deny all access
  • In the dialog box that appears click on Enabled.
  • Click on OK.
  • Exit Local Group Policy Editor and Log off
  • After you Log on insert a CD/DVD and check n see if you can access it's contents or not.

The ultimate cool tool for Windows Explorer

Posted on Aug 25, 2008

The StExBar provides many useful commands for your everyday use of Windows explorer. And you can add as many custom commands on your own as you like.

StExBar screenshot

See how it looks in action:


Have you ever needed to open a console window while you were using the explorer? And to have that console already set to the directory you're showing in explorer right now? Well, StExBar provides that with one simple mouseclick. There's also a hotkey defined for this: simply press Ctrl-M to open the console.

A 'lightweight' console is also available. Simply enter the command you like to execute into the edit box on the right of the StExBar and hit enter. The command will be executed in the system console.

Have you ever needed to have the name or full path of one or more files in another application? Ctrl-C doesn't work here, that won't copy the file path but the file itself. StExBar comes to the rescue. It provides two commands, one to copy all selected file/foldernames to the clipboard, the other copies the whole paths of all selected items. To make it even more easier to use this, a hotkey is defined Ctrl-Shift-C which copies the selected paths.

creating a new folder

Creating new folders is a common task in explorer. But to actually do that, you have to right-click on a folder background, choose "New" from the context menu, wait until the submenu finally appears, then choose "Folder" from that submenu. Not anymore! StExBar provides you the same with one easy click. Or even faster with the assigned hotkey: just press Ctrl-Shift-N and you have a new folder created in the current directory.

StExBar can also help you renaming multiple files at once. It uses Regular Expression strings to do so.

You can add your own commands to the StExBar and define hotkeys for them.


Download

Source

ASUS to Offer Eee PCs with 320GB HDD & Windows Vista?

Posted on Aug 22, 2008


According to reports, ASUS is said to be working on new N-series Eee PCs which are very likely to "shake up" the netbook market. Reasons? Not much is known about these N-series Eee PC (No official confirmation here whatsoever) except that they will likely feature up to 320GB spinning hard drives and full fledged Windows Vista installation.

If this ever sees the light of day, the N-series Eee PC will be priced between $480 - $640 range. It is expected to come in 10" size.

We hope ASUS doesn't fail in offering minimum of 2GB RAM since we hear the word Vista!


ASUS Eee PC

source

Make your Vista Computer invisible in a network

Posted on Aug 21, 2008

This short tutorial will tell you how you can hide your Computer running Windows Vista from being shown in a network to other computers connected to the same network. Suppose you are connected to a network of many computers then this could be helpful in order to prevent others from being accidentally connecting to your computer as it happens sometimes while browsing the network.


Here's how you can do this>>>

  • Click on Start button, type regedit in the search box and hit Enter
  • Inside the Registry Editor navigate to HKEY_LOCAL_MACHINE\SYSTEM\CurrentControlSet\Services\LanmanServer\Parameters
  • Right-click on Parameters, click on New >>select DWORD (32-bit) value >>type hidden and hit Enter


  • Now double-click on hidden and select Modify.
  • Type 1 in the Value data field and hit Enter
  • Close the Registry Editor and reboot your system for the changes to take effect.
  • Now to check if the tweak worked or not click on Start button, type cmd and hit Enter.
  • In the cmd prompt, type Net Config Server and hit Enter
  • On moving down you will see "Server hidden" and it's status is set to "Yes" which means now your computer is hidden in the network.

How to rectify the corrupt icons problem in Windows Vista

Posted on Aug 19, 2008

Sometimes icons does not appear correctly in Windows Vista because they get corrupted. This can be rectified by rebuilding the Icon Cache. In order to rebuild the icon cache we'll first have to delete it so that windows will rebuild it upon a system reboot.


Here's how you can do this>>>

  • First Enable Show hidden files and folders.
  • Open up My Computer
  • Navigate to %systemdrive%\Users\"your User Name"\AppData\Local
  • Look for IconCache.db and delete it permanently even from the Recycle Bin
  • Reboot your system.
  • Now you have your Icon Cache rebuilt and any corrupted icons that you might had should get corrected.

Make your Drive disappear in Windows Vista

Posted On Aug 18, 2008

Today I'm going to share a simple tutorial with you all. It will tell you how you can hide a Drive in Windows Vista. This will be helpful to you in case u want to hide your personal stuff from others, just put all that stuff in a drive and make it disappear .There may exist some third-party tools but this tutorial is as simple as any other thing could be.

Here's how u can do this>>>

  • Click on Start button, type gpedit.msc in the search box and press Enter
  • Click on Continue to bypass the UAC prompt.
  • In the left pane, navigate to User Configuration>> Administrative Templates>> Windows Components>>Windows Explorer.
  • In the right pane of the window double-click on Hide these specified drives in My Computer
  • In the dialog box that appears click on Enabled.
  • Select the drives you wish to hide from the drop-down menu given just below in the same dialog box
  • Click on Apply and OK and then close the Local Group Policy Editor.
  • To check if it worked or not you can open up My Computer and see if the drive that you selected to hide is there or not.

Work faster with Windows Vista

Posted on Aug 17,2008

In previous blog posts I’ve talked about how you can work faster by creating desktop shortcuts, enabling you to quickly accomplish tasks by simply clicking on them. I’ve recently found out about a neat little program called NirCmd which can help you to make shortcuts for all kinds of tasks, and makes working with Windows Vista faster than ever.
It’s available for free download from http://www.nirsoft.net/utils/nircmd.html. All you need to do is extract the files from the .zip archive folder and place it somewhere memorable. I recommend creating a new folder on your main hard drive (in my case C:\) and name it “nircmd”.

To create a shortcut, all you need to do is right-click on your desktop and go to New > Shortcut. In the location box type in the location of nircmd.exe (which is where you created the new folder) . In my case this is C:\nircmd\nircmd.exe. Then enter in the command from either the list found here or below.

For example, if I wanted to make a desktop shortcut that turned my PC’s sound on and off I would create a shortcut for:
C:\nircmd\nircmd.exe mutesysvolume 2

Then all I would need to do to mute the sound was click on that shortcut. If you right-click on your newly created shortcut and select Properties in the Shortcut key: textbox you can assign a key combination, such as Alt and M, to run the shortcut instantly!

short2

Here are some other commands that you can try:


cdrom open d:
Opens the door of your CD/DVD drive, where d: is the letter of your drive


monitor off
Turns off your monitor


screensaver
Turns on the screensaver


standby
Puts your computer into standby mode

exitwin poweroff
Turns off your PC

win min class "IEFrame"
Minimises all Internet Explorer windows

win close class "IEFrame"
Closes all Internet Explorer windows

setdisplay wwww hhhh cc
Sets your monitor’s display settings, where wwww is the width in pixels, hhhh the height in pixels and cc the number of colours. For example, if I wanted to create a shortcut to change my display settings to 1680x1050 resolution with 32bit colour I would define the shortcut’s location as C:\nircmd\nircmd.exe setdisplay1680 1050 32

dlg "" "" click yes
Answer Yes to a standard Windows dialogue box


There are many more commands you can add to your shortcuts; these can be found at http://www.nirsoft.net/utils/nircmd.html.
source


Best Windows Vista Blog Contest 2008

Posted on Aug 15, 2008

WinVistaClub, in association with Windows Vista - The Official Magazine, is organising a contest to recognise some of the best Windows Vista Blogs and Websites.

So if you run a blog or a website, which primarily focuses on Windows Vista, we invite you to submit your Blog Title, Blog HomePage url along with upto a 4 line description about it. The blog may cover Microsoft & Windows in general, but must also cover Vista in particular. It could focus on Tips, Tutorials, Support Forums, Customization & Themes, News, Views, or anything which may interest a Vista user.

From among the submissions, the 10 best blogs will be picked up by a panel of Judges. The Panel of Judges include Steve Sinchak MVP of TweakVista.com, John Barnett MVP of Windows Vista Support, Kerry Brown MVP of VistaHelp.ca, Steven Bink of Bink.nu, James Stables of Windows Vista Magazine, Emil Protalinski of Arstechnica, Aryeh Goretsky MVP of Lockergnome.Com, Barney Tormey Global Moderator at Neowin and Anand MVP.The blogs will be judged on the basis of quality of content, integrity, along with the frequency of updates. And this is going to one difficult task.

The Winner of the WinVistaClub Best Windows Vista Blog Contest 2008 will also get a Windows Vista Ultimate 32/64 bit DVD Box Pack, a Free 1 year license of ESET Smart Security Suite, a License of Magic Utilities, a License of MagicTweak, a one year subscription to the Windows Vista Magazine and a link for 3 months on the WinVistaClub HomePage.

The 2 Runners-up will get a License of Magic Utilities & a subscription to the Windows Vista Magazine each.
The 4th and 5th runners-up, will get a subscription to the Windows Vista Magazine each !

And first 100 participants who submit their Blog/Website’s here will also get a FREE 6 months license of ESET Smart Security Suite !

The 10 blogs selected will be put up for vote from 26th Aug to 09th Sept. The winner & 2 runner ups will be picked up and the announced by around 15th Sept 2008.


mgctwk2 e729d653

For more details about the contest, CLICK HERE.