Windows 7 : Maximizing and Restoring Windows made easier

Posted on Nov. 2, 2008


As Windows 7 making news all over the web about it's new features like Superbar (new taskbar), Jump lists and the Ribbon interface etc.,i decided to try it out and i am quite satisfied with the OS as it is performing so well being in the pre-beta stage.
      
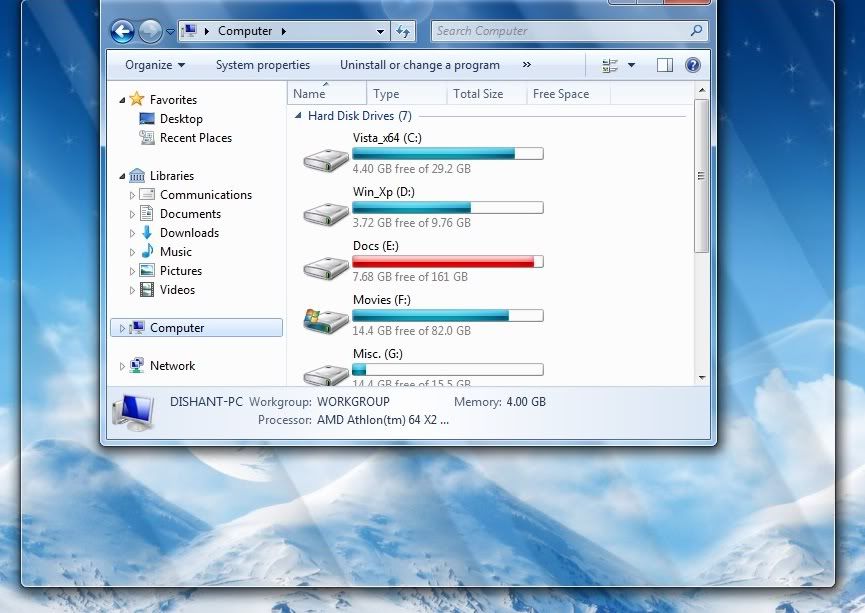
One cool feature that i found in Windows 7 is that now we can maximize a window just by dragging it to the upper edge of our desktop and restore it just by doing the reverse. When you drag a window to the left edge of the desktop it occupies the left half of it. While you drag a window to the upper edge of the desktop in order to maximize it, you see an imaginary window frame with a  bubble like effect originating from the point where your mouse pointer touches the upper edge of the screen and it looks cool. (see screenshot below)


Google Preview Add-On For Firefox

Posted on Sept. 9, 2008


Mozilla Fiefox is known for a large number of Add-ons that makes the best browser even better.In the long list of those powefull Add-ons, here comes another one GooglePreview 3.13. The GooglePreview 3.13 shows preview thumbnail images of websites you are searching on your google and yahoo searches. It not only makes the searches look better but can help you make a better choice of which page to go to.


You can switch back to normal mode by clicking that small GP icon in the bottom-right corner of browser window.

Download Link
 

Creating, Installing & Managing Google Chrome Themes

Posted on Sept 9, 2008


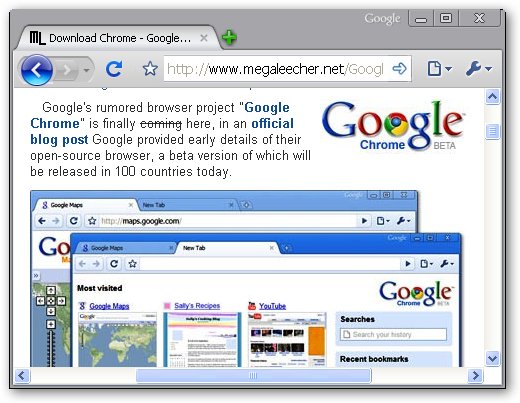
As of now, Google Chrome BETA does not support themes officially and provides no way to manage them, However, free software are now available to easily create, install and manage themes for the browser.

Google Chrome Firefox Theme


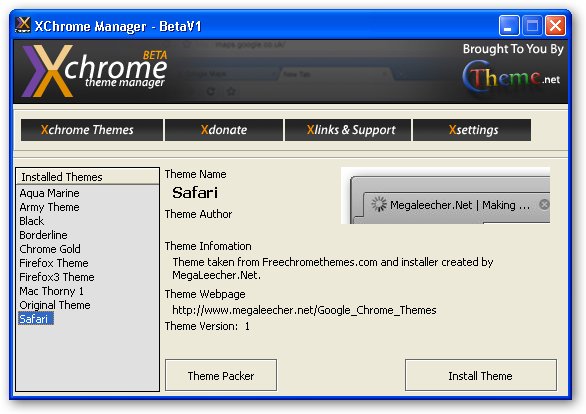
Xchrome Theme Manager is the first and only software currently available to install and manage Google Chrome Themes, The free software is still in BETA but lets you fully automate the installation of Google Chrome themes without any hassles.

XChrome Theme Manager
Xchrome Theme Manager Features:
  • Automated Theme Installation.
  • Edit and build your own Google Chrome themes.
  • List of all Google Chrome installed Theme with preview and author details.
  • Theme Installer for creating single click Google Chrome theme installers.

Sign in With GMail, Yahoo or any other email A/C in Live Messenger

Posted on Sept 8,2008

 
With the help of this Tutorial you can sign in to Windows Live Messenger using your Gmail, Yahoo or any other account, no need to install any other Messenger.Let us see how its done, For example say you want to use your Gmail as Windows Live ID and you want it to use for Windows Live Messenger.


Go to Windows Live ID or just Windows Live ID which will take you to the link. Scroll down to “Sign Up Today” > “Use an e-mail address you already have” > And click on the link Get started now. This link will open up a Create Credentials page. Just fill up with your Gmail address you want to use and set password. This password may not be same what you had given for Gmail address while registering it. Fill the form completely and Press Continue. So this creates your credentials for Gmail.


After that you will get two mails sent to your Gmail address. One will to “Confirm your e-mail address for Windows Live ID” and the other mail “Welcome to Windows Live ID”. So once you confirm your e-mail, you are ready to use your Gmail as Windows Live ID.


Here you can see I am signed into Windows Live Messenger with my Gmail as Windows Live ID.


source

Fix: Dragging a Folder does not create Shortcut in Favorite Links in Vista

Posted on Sept. 8, 2008


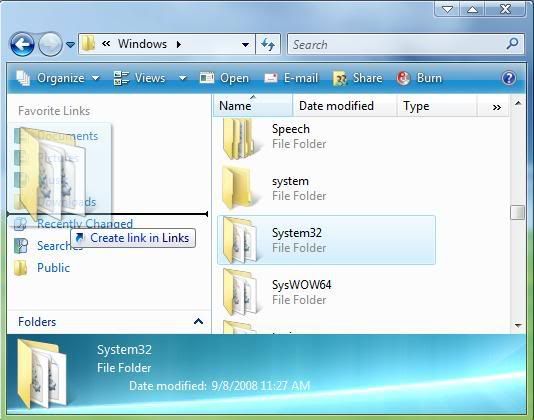
In Windows Vista we have got Favorite Links under Windows Explorer where we can place shortcuts to folders for easy access. But I've seen a problem on some vista pc's where when i tried to create a link for a folder by dragging it in the Favorite Links area, the whole data inside that folder including sub-folders were moved to the Links folder which was not supposed to be.(see screenshot)


The solution of this lies in the Desktop.ini file in the Links folder. Open it with Notepad and look for the line DefaultDropEffect=4, if that's missing then copy and paste it after the line:


IconResource=%SystemRoot%\system32\imageres.dll,-185.


Now save the file.The DefaultDropEffect line sets the default drag-and-drop action. Setting it 4 creates a shortcut of the dragged folder in the Links folder.


After that right-click on the desktop.ini file and set its attribute to Read-only and Log off Windows. Now you should be able to create a link in the Favorite Links area by dragging a folder instead of moving it.(see screenshot)


Add Your Favorite Program Shortcut in IE 8 toolbar

Posted on Sept 7, 2008

 
This tutorial will show you how to add your favorite program shortcut in IE 7/ IE 8 toolbar. You can add any program you want. In our example we will be using CCleaner which can be used for removing cookies, url history, temporary internet files, recent typed url's etc. etc.
  
Here's how you can do this>>>
 
  • First install CCleaner.
  • Download CCleaner icon from here.
  • Extract the zip archive to a folder on your hdd.
  • Move the ccleaner_app.ico from the folder to your CCleaner installation directory( which is normally C:\Program Files\CCleaner\).
  • Click on Start button, type regedit in the search box and hit Enter.
  • In Registry Editor, navigate to HKEY_CURRENT_USER\Software\Microsoft\Internet Explorer\.
  • Right-click on Internet Explorer, select Key from New menu and type Extensions.
  • Again right-click on Extensions, select Key from New menu and type {7A8B2368-E336-49c5-A762-0FF3E7E09DDE}.
  • Select this Key and move into the right pane. Here we will create some strings as given in the screenshot below with their respective names and values.

 
  • Close the Registry Editor.
  • Open Internet Explorer and see if you got the CCleaner icon in the toolbar as given in the screenshot below:


If you can not see it on the toolbar, you can get it by customizing the toolbar.

How to Customize Quick Access toolbar in MS Word

Posted on Sept 6, 2008
The design of Word 2007 is significantly different from previous versions of Word. So it is understandable that frequently used commands are difficult to find.Long-time users of Word may find the Ribbon disorienting. But the Quick Access toolbar puts important commands a mouse-click away.

When you install Word 2007, only three commands appear on the Quick Access toolbar: Save, Undo, and Redo.Fortunately, you can add more commands to the Quick Access toolbar. You won’t want to add too many, as this could slow you down.
 
 
To add a command to the Quick Access toolbar, click the downward-pointing arrow beside the toolbar.You can select from any of the commands that appear. Or, you can click More Commands if you don’t see the one you would like to add.

In the box labeled “Choose commands from,” select a category. In the box below that, select a command. Click OK
 
  
The command will appear on the Quick Access toolbar.
 
 
 Now you have your own set of commands in there.

Remove Shutdown options from Vista Start menu

Posted on Sept 6, 2008
 
In this tutorial i'll show you how to remove the Shutdown, Hibernate, Sleep and Restart options from the start menu in case you don't want them to be there and also from the Windows Security screen which appears when you press Ctrl+Alt+Del.
 

Here's how you can do this>>>
  •  Click on the Start button.
  •  Type gpedit.msc in the search box and hit Enter. 
  •  Click Continue to bypass UAC prompt. 
  •  In the left pane, navigate to User Configuration>>Administrative  Templates>>Start Menu and Taskbar 
  •  In the right pane, double-click on Remove and prevent access to the Shutdown, Restart,Sleep, and Hibernate commands


  • In the dialog box that appears, click on Enabled radio button and then OK.
  • Exit from Local Group Policy Editor.

New Aero_Redefined theme for Windows Vista

Posted on Aug 4, 2008

I've created a new Aero_Redefined theme for Windows Vista keeping in mind the simplicity of the default windows Aero. It does not contain any special stuff but has a sober and elegant shellstyle that may suit your liking. As it's my first theme, tell me how is it by giving some comments which would help me in doing better in future.


How to install>>>


1.To install this theme you need to patch your system, via VistaGlazz or TuneUp Utilities.

2.Next unpack “Aero_Redefined”
to ‘C:\Windows\Resources\Themes’ (where C is the partition with Windows installed)

3.Now you can change the visual style by clicking any .msstyle file, or via   ‘Control Panel\Appearance and Personalization\Personalization\Window Color and Appearance’
  
Download Links:


 Aero_Redefined 

 VistaGlazz
 

How to Hide video, audio or doc files in a single image file

 Posted on Sept 2, 2008


Today i'll show you a cool trick of hiding any video, audio or document files inside a jpeg.With the help of this trick you can hide your personal files like word documents, videos, audio files etc.in a single image which you can put in anywhere, say, in your wallpapers. Lets see what i'm talking about:

Here's how you can do this>>>
  • Choose the files which you wanna hide into the image. In our ex. i want to hide a mp3 file(1.mp3)+an avi file(2.avi)+a word document(3.doc).
  • Pick any image(guitar.jpg in our ex.) in which you want to hide your files.
  • Create a new folder in C:\, give it a name, say, secret.
  • Now put all the files which you wanna hide and also that image file into that folder.


  • Now compress the 3 files which you wanna hide using winrar/winzip.

 
  • The archive.rar contains our 3 files. So delete those 3 files from the folder.
  • Go to Start>>Run and type cmd.
  • Get inside our secret folder.
 

  • We'll be using the following syntax : copy /b image.jpg + winrar.rar newimagename.jpg” (without quotes).
  • In our case the command will be:  copy /b guitar.jpg + archive.rar  wallpaper.jpg
  • Press enter to execute the command.
   

  • You will get a message 1 file(s) copied”.
  • Now you will get a wallpaper.jpg file in the secret folder.


  • Delete all the files except that newly created jpg file.
  • Now right click that wallpaper.jpg file and open it with Winrar.
            
You can see the 3 files hidden in that jpg file. Now you can simply put this wallpaper.jpg file in a group of image files and no one will notice it.

Eight ways to save time with Windows Vista

Posted on Sept 1, 2008

Windows Vista comes with loads of features that can help save you time, especially with tasks that you perform regularly. Try out these tips and see how much time you can save


  • Send an email straight from your desktop

If there’s someone you often send mail to, you can add a shortcut to your desktop to create a new email. Make a new shortcut and type in mailto: followed by your recipient’s email address, for example mailto:windowsvista(at)futurenet(.)co(.)uk. Click Next, give the shortcut a meaningful name and then click Finish. The new shortcut will appear on your desktop, and double-clicking it will open up a blank email in your default email editor with the recipient’s address already filled in.


  • Quickly check your network connection status from your desktop

You can create a shortcut to quickly check the status of your internet connection, saving you the effort of clicking through a number of windows and folders. Go to Start > Control Panel > Network and Internet > Network and Sharing Center > Manage network connections. Right-click on the connection you want to check the status of and select Create Shortcut. This will place a shortcut on your desktop, and when you double-click it you will be taken directly to the status page of your connection.


  • Create shortcuts to your favourite web sites

You can save time by having shortcuts to frequently visited web sites on your desktop. Browse to the page that you want quick access to, and then drag and drop the small icon on the left of the address bar to your desktop. Now all you need to do is double-click the shortcut to go straight to the page.


  • Get all your breaking news in one place with RSS feeds

If you have a number of news sites that you check regularly you can save time by subscribing to their RSS feed (click on the orange RSS icon on the web site). This sends their latest headlines directly to your RSS reader (such as Microsoft Outlook or Internet Explorer), allowing you to keep up to date with all your favourite sites in one place. The RSS feed for this web site is
www.windowsvistamagazine.com


  • Use Start Search

Use the Start Search to quickly launch programs rather than trawling through your computer to get them. Below are some handy phrases to type into the search to bring up the application straight away. Depending on what you have installed on your computer you may be able to find other phrases to launch your programs with, so it is worth experimenting.

CMD Command prompt
DEV Device Manager
SYS System Restore
NETW Connect to a Network Projector
UPD Windows Update
PROG Default Programs
EVE Event viewer


  • Get the App Launcher sidebar gadget

There are a number of gadgets available from Windows Live Gallery that can help you speed up your computer use. The App Launcher gadget grants you fast access to files and folders by clicking on an icon that instantly launches them. It helps keep your desktop and Quick Launch free from clutter. ]


  • Install Launchy

Launchy is a powerful keystroke launcher, which is accessed by pressing Alt and Space bar. You can then type in the name of the application, file or web site you want to launch and press Enter. Launchy is intelligent enough to guess pretty accurately what you are looking for whilst you type, so by just typing goo then pressing Enter will open Google. You can download it for free at www.launchy.net


  • Use Task Scheduler to automate tasks

Save yourself a lot of time by using Task Scheduler to make Windows Vista automatically perform certain tasks. Type ‘Task Scheduler’ into Start Search and select what you want it to do, from defragmenting your hard drive to backing up your files, and when.

source

Make your Desktop Background permanent in Vista

Posted on Sept 1, 2008


If you like your desktop background wallpaper and don't want anybody to change it then this tutotrial will be useful for you. The tutorial consists of two steps:  

1. Removing the Desktop Background option from the Personalize appearance and sounds screen.  
2. Disabling the Set as Desktop Background option which appears on right-clicking an image.

But before doing that you shud set your favourite wallpaper on desktop.

Here's how you can do this>>>

1.Removing the Desktop Background option

  • Click on the Start button
  • Type gpedit.msc in the search box and hit Enter. This will open Local Group Policy Editor.
  • In the left pane, navigate to User Configuration>>Administrative Templates>>Control Panel>>Display.
  • In the right pane, double-click on Prevent changing wallpaper.


  •  In the dialog box that appears, click on Enabled and then OK but don't close GPEditor.

 2. Disabling the Set as Desktop Background option

  • In the left pane of the local group policy editor, navigate to User Configuration>>Administrative Templates>>Desktop>>Desktop


  • Moving into the right pane, double-click on Desktop Wallpaper.
  • Click on Enabled radio button.
  • In the Wallpaper Name field, type the full path of the wallpaper you want to display.
  • In the Wallpaper Style field, select whether you want the wallpaper to be in Center, Stretch, or Tile style.
  • Click OK and exit the Local Group Policy Editor.
  • Reboot your system to reflect the changes.

Evolution of the taskbar in Windows 7 - “Superbar”

Posted on Aug 30, 2008

 
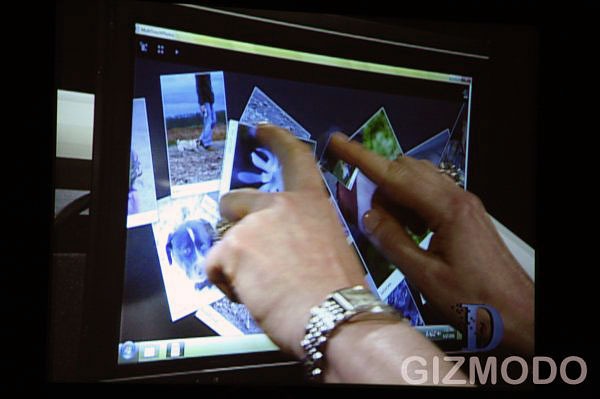
Some of you with a sharp eye might have noticed something very interesting on-screen during the Windows 7 multi-touch demonstration at the D6 conference yesterday. If you did, you might be curious to understand what you saw. If you didn’t, read on anyway. Update: The new taskbar is superficially called the “Superbar”.


Picture credit: Gizmodo
The picture above comes from the video feed of Julie Larson Green’s (Vice President of Windows Experience Program Management) demo of the multi-touch picture browser demo app. The quality is a little rough, but you can easily notice a few things that are different.

The first being the taskbar is higher than usual, but not as big as double-height. If I were to guess, I’d say its somewhere around 1.75x-high. In the left corner, the Windows orb remains wedged “on top” of the taskbar - sticking its head out a little - instead of in the center like it is today in Vista.

The taskbar also appears ‘divided’ into sections by variations in the color (dark, gray, lighter) to indicate the different areas. Speaking of which, if you look at the far right corner, you’d notice that the tray (icons & clock) is not touching the edge of the screen, and there’s a small lighter gap. I have no explanation for this, but is well worth keeping an eye on.


A double-height taskbar in Windows Vista


Keeping the focus on the right, the tray is also different. The icons sit in the middle of the taskbar, instead of wrapping in two-lines like it does today, whilst the date now wraps on two lines instead of three. This clearly indicates this taskbar cannot accommodate three lines of text........continue reading

Access Windows Registry through Explorer Shell in Vista

Posted on Aug 30, 2008


We all know how important Windows Registry is when it comes to tweak settings in windows. We use it to customize the way windows works. To make any changes in registry we have to run Registry Editor which can be done in many ways. But there is an alternative of not going to Registry Editor and that is the Windows Vista Registry Shell Namespace Extension.This Shell Extension allows Windows Explorer to be able to view and interact with the Windows Registry. You can search, edit, create or delete registry information via windows explorer.It also demonstrates new concepts in Vista including the property system extensibility and content indexing.


See how it works:


Download : 
 

Tweak the Recycle Bin Context Menu in Vista

Posted on Aug 29, 2008

With the help of this tutorial you will learn how to add a program of your choice to the Recycle Bin context menu for easy use in Windows Vista. As an example I will be using the program TuneUp Utilities.

Here's how you can do this>>>
  • Click on the Start button.
  • In the search box, type regedit and hit Enter.
  • Click Continue to bypass button the UAC prompt.
  • In regedit, navigate to
    HKEY_CLASSES_ROOT\CLSID\{645FF040-5081-101B-9F0B-00AA002F954E}\shell
  • In the left pane, right click shell and click Key under the New menu.
  • Type the name of the program TuneUp (you can type anything you wish, it just makes sense to give the name of the program) and press Enter.
  • Again in the left pane, right click on the TuneUp key we created in the above step and click Key under the New menu.
  • Type command and hit Enter.

  • Moving into the right pane, double-click on (Default) and click Modify
  • In the Value data field, type the full path of the program.exe file

  • Click OK to apply
  • Exit Registry Editor and you're done.
  • You can add as many programs as you want. Just repeat the same steps for each program.

Intel shows off 16 GB DDR3 DIMMs at IDF

Posted on Aug 28, 2008

San Francisco (CA) – You can’t have enough RAM, as is often said in the computer world, and Intel has demoed 16 GB RAM sticks at its Intel Developer Forum in San Francisco.  The RAM is made by Hynix and uses technology from MetaRAM to stack all the individual DRAMs onto the stick.  Intel reps showed off the memory inside a number crunching server that was populated with 10 of these sticks for a total capacity of 160 GB of memory – heck some people don’t even have hard drives this big.

The server was running dual Nehalem EP processors and was churning through a massive 100 GB for the top ten customers of a company.  An Intel rep told us the program had loaded the file into RAM and this gave approximately a 1000 times speedup versus doing the same computation from the hard drive.

The upcoming Nehalem processor will use triple channel DDR3 memory so you’ll need to fill three memory slots for maximum memory bandwidth. source

Click image to open!
Click image to open!Click image to open!Click image to open!

IE8 Beta 2: Great new features, old annoyances

 Posted on Aug 28, 2008
 
Image 


Useful new features

It is obvious that Microsoft’s IE engineers had some innovation pressure from some management levels above and there are, in fact, a few interesting features. First, there is finally a “Find on this Page” feature you can actually use, since it is placed in its own field below the address bar. Searching web pages for certain words or phrases is also enhanced through search result highlighting and search result count.

Just like Firefox, IE8 can also store a browsing session and reopen it when the software is restarted.

The “Smart Address Bar, which offers a neatly structured, instant search feature when you are entering a URL, is also new. Similar to the Firefox idea, the Address options are very organized, easy to read and in most cases actually useful – especially when you are looking for a certain section on a website and simply don’t know its sub-level address.

The best new feature, hands down, is Tab grouping. At least I tend to have countless tabs open and once you exceed ten or more tabs, it gets confusing and you have to start reorganizing those tabs. IE8 does that for you in a color-coded fashion. The colors themselves are a matter of taste, but as long as you are opening tabs through the context menu (right mouse click), a new tab will appear in the color of the originating website. This feature is a perfect example how simple ideas can have a huge impact.

Tabs now also come with “crash recovery”, which means that the content in a tabbed window is automatically restored and reloaded - and any information the user may have already entered on the page (such as when writing an e-mail or filling out a form) is restored.

Under the hood, there are new features you won’t see in the user interface - which, however, are milestones for Microsoft. First, the browser is much closer to common web standards than any other version before (Microsoft says it passes the Acid2 browser test), CSS 2.1 will be implemented in the final version of the browser, there are Document object model (DOM) and HTML 4.01 improvements and there is support for W3C’s HTML 5 Draft DOM Storage standard and the Web API Working Group’s Selectors API.


Useless new features    

Microsoft would not be Microsoft if there wasn’t an overload of features that in fact make the browser (12.7 MB download) appear bulky. Each user may have a different opinion what these features may be, but at least in this version it seems to be Microsoft’s Web Slices and Accelerators (renamed from “Activities”). On one side, Microsoft promises to stay within general HTML guidelines and on the other the company cannot resist to create proprietary features that are not part of any standard and are not supported by any other browser. Is it just me or does this sound strange?

Both Web Slices (a way to subscribe to certain content) and Accelerators (quick access to maps, for example) are obviously a try to standardize certain features and convince web developers and other browser developers to adopt this functionality. To me, both features are nice and may be certainly useful in some cases, but will they improve your browsing experience in general? No. In some scenarios, IE8 feels too heavy. The browser interface clearly needs another workout to trim some of the fat it has gained over the years. 


Old Microsoft habits


The installation process of the browser remains unacceptable and one big annoyance. Even on my relatively speedy PC, the installation process took 28 minutes from beginning to end. For 17 minutes, the PC was unusable, since the PC needs to be restarted and updates need to be reconfigured.

Why is it that Firefox can be downloaded and installed on the go without the need for a restart of the PC and Microsoft takes my PC hostage for 17 minutes for a simple browser update? I may be picky here, but iE8 is not particularly convenient (and transparent) to install. (this is the worst thing for me)

You can download IE8 Beta 2 here.

Read Full Artile Here (it's a must read)

Adobe Photoshop CS4 Codenamed StoneHenge Leaked !!

Posted on Aug 27, 2008
I was quite surprised today when I saw an email in my Inbox letting me know that Adobe Photoshop CS4 (codename Stonehenge 11.0) has been leaked.Many tech blogs and forums are reporting leak of Adobe Photoshop CS4 Codenamed StoneHenge on torrent sites, After doing some research and reading the contradicting comments this 454.57 MB download seems fake to me, since downloading and installing such thing is illegal, I am unable to verify this myself.


The reported compilation date of this build is 1st November 2007, the above version is said to have fixes for Vista users.

Automatically Backup Your Firefox Environment To Box.net

Posted on Aug 27,2008

Few days ago my Firefox profile got corrupted and resulted in loss of essential data, Loosing your browser's saved passwords, bookmarks, settings and customizations can be very frustrating if a lot depends on it, While searching for Firefox profile backup solutions, I came across FEBE - A simple to use, highly customizable Firefox Environment Backup Extension, unlike other Firefox backup and restore solutions FEBE lets you automatically backup your browser data of choice to Box.Net free online storage service, allowing you to easily synchronize your office and home browsers. 


 FEBE lets you backup your Firefox extensions, themes, bookmarks, preferences, passwords, cookies and just about everything else Firefox offers (it can even backup/restore your entire profile).
Features:
  • Schedule automatic backups on a daily, weekly, or monthly basis.
  • Save backups in time-stamped folders to easily identify when the backups were created. Specify how many folders you wish to keep and FEBE removes the oldest.
  • Backup reminder. FEBE can alert you if a backup has not been completed in a specified number of days.
  • User-defined backups. Make backups of virtually any file or folder - Firefox related or not. Just specify what to backup and FEBE does the rest.
  • Upload backups to your remote Box.net account automatically or with a single click.
  • Verify your extension directory. Upgrading to Fx 3.0 sometimes leaves garbage in the extensions directory. FEBE can clean it up.
  • Quick Backup. You can quickly backup as many or as few individual extensions/themes as you like. They can be saved together in a single, installable xpi file (Similar to CLEO). 
Download 

FEBE Homepage

Customize Vista Logon screen with a Text Message

Posted on Aug 26, 2008

With the help of this tutorial you can display a Message Title and Text of your choice. This message will be displayed on a screen which will appear before the logon screen in Windows Vista.


Here's how you can do this>>>

  • Click on the Start button, type regedit and hit Enter
  • Click Continue to bypass the UAC
  • In Registry Editor, navigate to HKEY_LOCAL_MACHINE\SOFTWARE\Microsoft\Windows\CurrentVersion\Policies\System


  • Move into the right pane, double click on legalnoticecaption and click Modify
  • In the Value data field, type a Title of your choice say "Warning ! Danger Ahead" (without the quotes) and hit Enter.
  • To give a text, double-click on legalnoticetext given right below and click Modify again.
  • In the Value data field, type a text of your choice say "Tighten your seat belts and Get ready to explore the World of Windows Vista"(without the quotes) and press Enter.
  • Exit Registry Editor and Log off to see the changes.

This is how the screen shud look:


Prevent Access to Removable Storage Devices in Vista

Posted on Aug 26, 2008

This tutorial will show you how to prevent access to all removable storage drives like CD, DVD and USB Pen Drives in Windows Vista. This will be useful in order to prevent any kind of unwanted data to be copied or moved to your computer and also to prevent harmful programs that can access your computer from any removable devices.


Here's how you can do this>>>
  • Click on Start button, type gpedit.msc in the search box and press Enter
  • Click on Continue to bypass the UAC prompt.
  • In the left pane, navigate to User Configuration>>Administrative Templates>>System>>Removable Storage Access
  • In the right pane, double-click on Removable Storage Access: Deny all access
  • In the dialog box that appears click on Enabled.
  • Click on OK.
  • Exit Local Group Policy Editor and Log off
  • After you Log on insert a CD/DVD and check n see if you can access it's contents or not.